
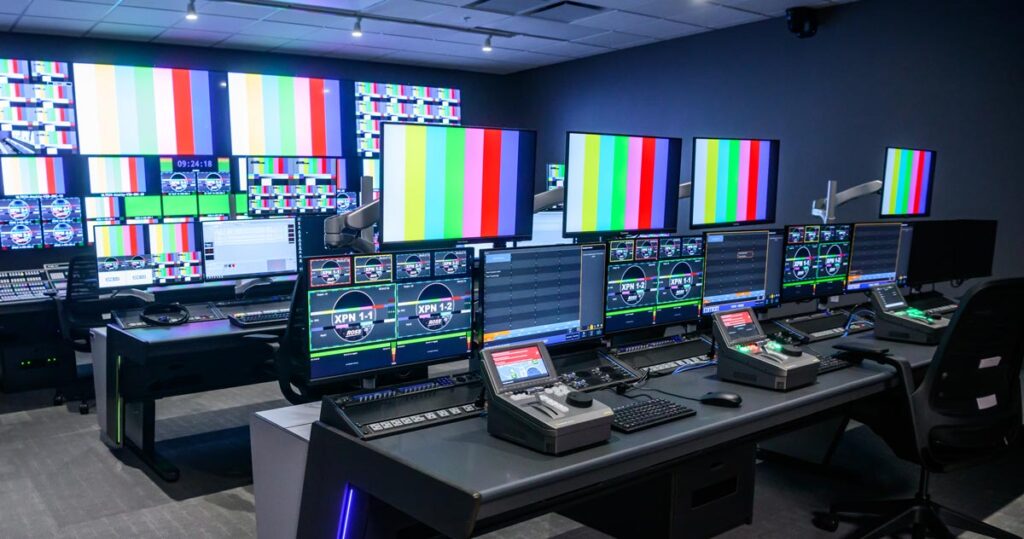

The visual command center of your control room deserves more planning than it usually gets.
The monitor wall is what the production team stares at for the entire broadcast. Every camera angle, every graphics channel, every replay source, and every external feed lives on this wall. The director makes split-second decisions based on what they see up there. If feeds are too small to read or critical sources are hidden in the wrong position, the production suffers.
Despite its importance, the monitor wall is often designed late in the project with whatever budget remains after the switcher, audio, and other equipment have been selected. That approach leads to compromises that the production team lives with for years.
Discrete Monitors vs. Multiviewer
Discrete monitors
Individual monitors mounted in a grid on the wall or on a rack frame. Each monitor displays a single source. This approach is simple, affordable, and easy to troubleshoot. If one monitor fails, you replace it without affecting the rest.
The trade-off is physical space. A control room monitoring 24 sources with discrete monitors needs 24 screens on the wall. That demands significant wall area and creates a busy visual field with bezels between every display.
Multiviewer
A hardware or software device that combines multiple video sources onto a single large display. One 65-inch screen can show 16 sources in a customizable layout. Multiviewers dramatically reduce the number of physical monitors needed and allow flexible arrangements that can change with a few button presses.
The trade-off is that individual sources appear smaller. On a 65-inch display showing 16 sources, each source window is roughly 16 inches diagonally. Fine detail is harder to evaluate. Multiviewers also introduce a single point of failure — if the device or the display fails, you lose visibility of multiple sources simultaneously.
The hybrid approach
Most professional control rooms use a combination. A multiviewer handles the bulk of source monitoring on one or two large displays. Discrete monitors show the most critical feeds — program output, preview, and key reference sources — at full size. This balances space efficiency with the ability to see critical outputs clearly.
Sizing and Viewing Distance
The size of each display on the monitor wall should be matched to the viewing distance of the operators who need to read it.
- Front row operators (3-6 feet from the wall): 16-24 inch discrete monitors or a multiviewer with windows sized for detail evaluation at close range.
- Back row operators (8-14 feet from the wall): 32-55 inch discrete monitors or a large multiviewer display (65-85 inches) with fewer, larger windows.
- Director’s program and preview: These should always be full-size discrete monitors large enough to evaluate at the director’s sitting distance. These are the most critical feeds in the room and should never be reduced to a small window on a multiviewer.
Layout Planning
The arrangement of sources on the monitor wall should follow the production workflow rather than alphabetical order or arbitrary grouping.
- Center: Program output and preview. These are the two feeds the director watches most.
- Flanking program/preview: Camera feeds in the order they are typically used. If camera 1 is the wide shot and camera 2 is the close-up, they should be adjacent and in the same relative position as the cameras in the studio or venue.
- Upper row: Graphics outputs, replay channels, and remote feeds that are referenced less frequently.
- Lower row or side: Utility feeds like clock, timecode, audio metering, and system status.
Map the monitor wall layout on paper before ordering any displays. Have the director and TD review it. They are the ones who will stare at it for every production. Their input at this stage prevents expensive rearrangements later.
Common Monitor Wall Mistakes
- Making every source the same size. Program and preview should be larger than utility sources.
- Placing the wall too high. The center of the wall should be at seated eye level for the primary operators.
- Forgetting about glare. The wall should not face windows or bright overhead lights.
- No spare inputs. Leave room on the wall for sources that do not exist yet.
- Ignoring the audio operator. If the audio position has a different sightline to the wall, verify they can see program output and relevant meters.
Designing your control room monitor wall?
TakeOne specifies and integrates monitoring solutions for every type of production environment. We will help you select the right combination of displays and multiviewers for your room.
Call 1-877-818-2531 to talk through your monitoring needs.
About TakeOne Broadcast Solutions
TakeOne is a full-service broadcast video integrator and consultant that designs, builds and supports professional video systems for sports venues, universities, churches and broadcast facilities nationwide. From control room design through equipment integration and operator training, we handle every phase of the project.
Request a control room assessment or call 1-877-818-2531 to discuss your project.